Background

Sunday, January 27, 2013

December / Early January Soaps

Wow - I can't believe I'm writing two blog posts today!  Since it's been so long since my last one, I guess there's a lot to catch up on.

First things first - here are pictures of the cut spa-type soaps I made in December.  They both smell so lovely (the purple is an EO blend my friend and I made and the green is a Bath & Body Works Coconut Lime Verbena).  They turned out great, and I can't wait to get them into my shower rotation :)


I really loved how the swirls turned out on the sides of the soap on this one.  However, there is no yellow on the actual bar of soap - I think the lighting is just wonky today with all the snow we're getting...


My parents went to a brewery a while back and bought a bunch of fruit beers (apple, cherry, raspberry, etc) and decided they didn't like them very much.  So, into the soap they go!  I didn't stick blend this one, because I wanted to keep it as smooth as possible.  I used the apple beer they gave me, added some silk, and a little cinnamon EO to round out the scent a little bit.  The apple scent from the apple beer comes through pretty strong still.  However, I think I broke my BB column mold on this one...

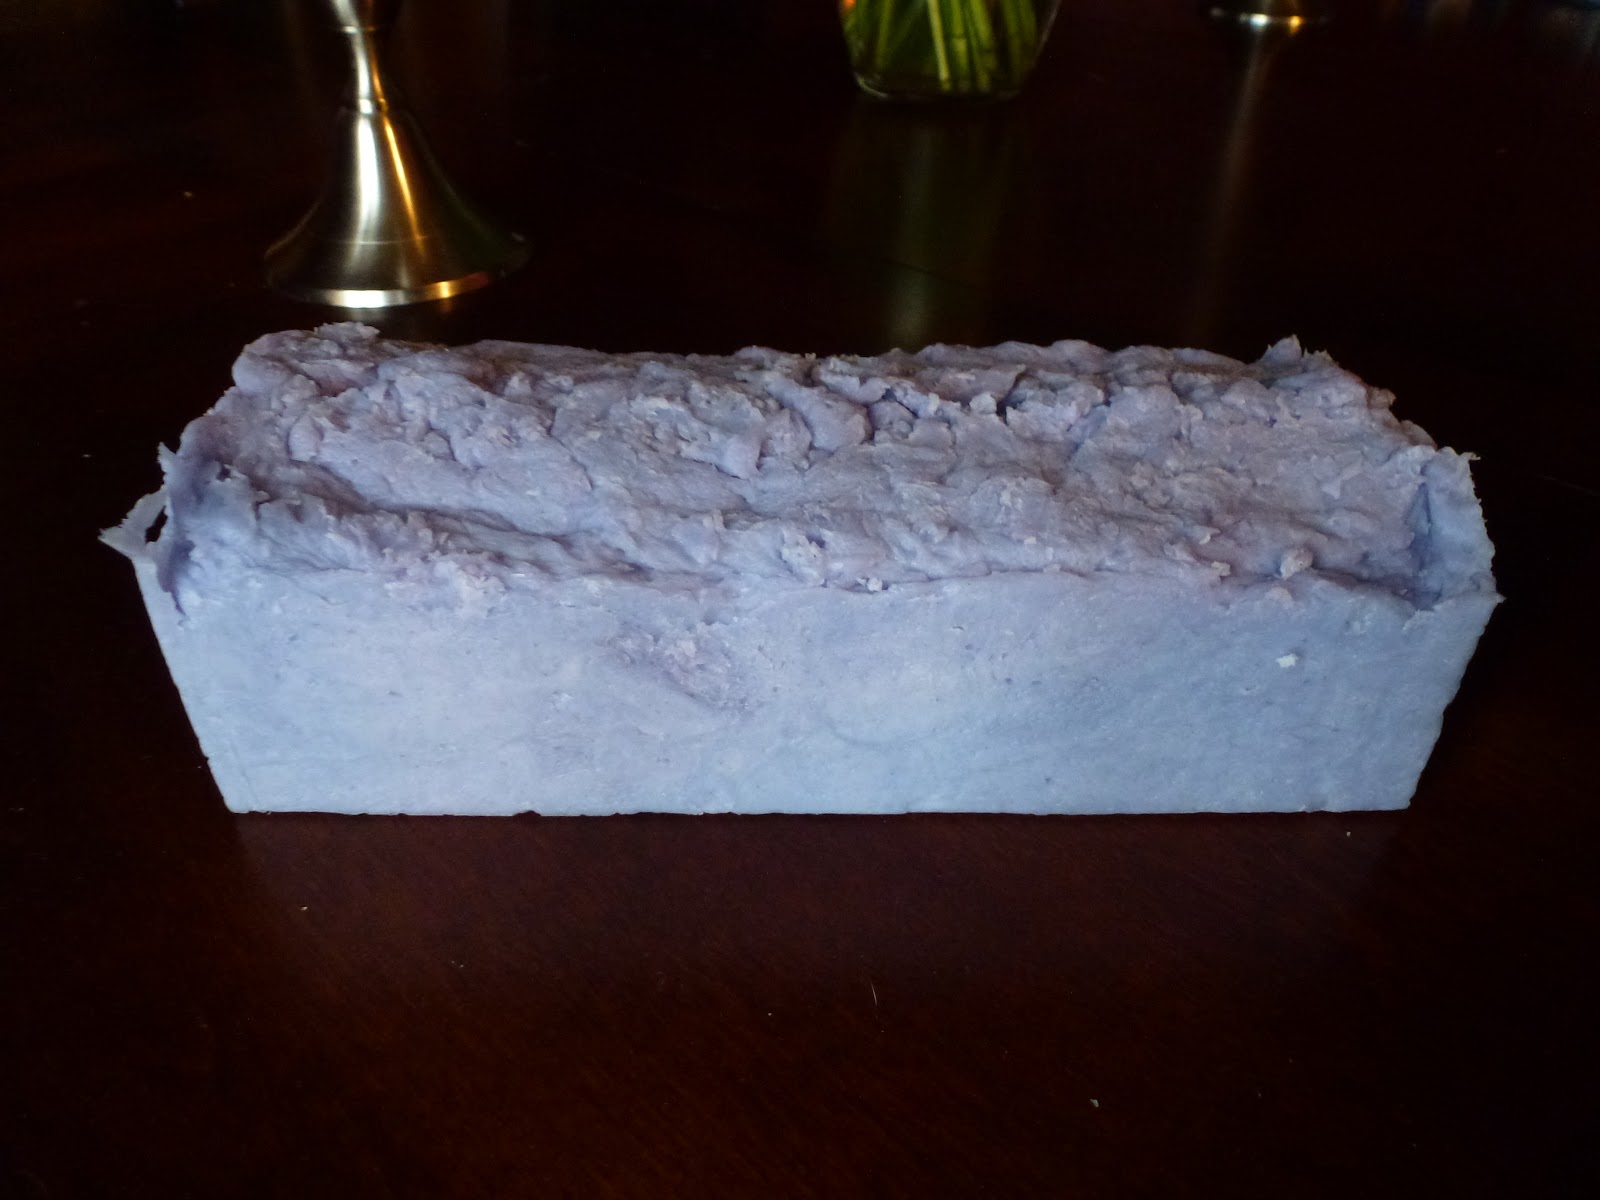
I was also inspired by the blogs by Great Cakes Soapworks on rebatching soap and decided to rebatch some scraps I had around as well as my first hot process disaster.  For the soap I made using the oil-heavy lavender hot process, I did not add any extra oil to the shavings, as it was still pretty soft, but I did add a half cup of castor oil to the "other" scraps.  They turned out pretty well - see below:
This rebatch was scented with a China Rain FO, and it's probably one of my favorite scents that I've soaped with so far! Love it. And even my husband loves it, too, which is odd, because I expected him to be more partial to the one below. 
This rebatch was scented with the Green Tweed FO from NG, and I love it, but I scented it a little light.  Would add more FO next time - it seemed to fade among the scents already in the scraps.
I really enjoyed these soaps, and I'm looking forward to making more beer soaps with the other beers my parents gave me.

~Chrissy

Soaps with Milk

Long absence everyone!  I have spent the past month enjoying time with family and friends, some down time for myself, and a little bit of time sick in bed with the flu that's going around and other various winter diseases.

But now, it's back to the blog (and hopefully soaping!) Last fall, I experimented with some milks in my soaps.  I had heard all about how lovely and creamy they made the lather, and I wanted to check it out for myself.  The first soap I made with cream (about 90% of the liquids) was this Pumpkin Spice soap, also using pumpkin puree and BB's Pumpkin Spice FO.  


It was awesome (and still is).  I loved the smell, it lathered beautifully, and it smelled delightfully pumpkin-y and also spicy for the fall.  This turned out so well, that I next tried this Gingersnap soap with coconut milk - 100% of the liquids for the lye. 

The colors turned out more gray than brown, even though the swirl was nice, and these bars in my slab mold were HUGE!  They averaged around 7oz when cut...  But when I was mixing the lye with the coconut milk, it started to turn a little orange.  That's okay, I told myself, because I'd read about it happening on various forums, blogs and soapmaking books.  I probably just was adding lye too fast to the milk.  However, when I got the solution mixed in and started to mix the soap batter, YUCK - what is that awful smell!  That coconut milk smells burnt and horrible!!

I told myself it would probably go away over time, and it is a favorite of many friends and family.  After curing for about 4-5 weeks, I no longer noticed the smell of the burnt milk, and my nose was not offended by this soap any more.  Great!

Next, I tried cream again (the heavy whipping cream from the grocery store) to make a peppermint soap.
I was sure I had the hang of soaping with milks now, so I was even faster about adding lye to the soap and used 100% cream for the liquid in the lye mixture.  I added the lye to cold cream (not frozen), and before long, it turned a brilliant orange.  I was not worried, because it had turned out well in the past, and I was sure this time would be no different.  As I was soaping, I tried not to notice the horrid smell of sour, burnt milk.  It was terrible.  I scented with peppermint EO to cover up the milk smell, and let it cure.

The scent did fade over time, I noticed.  But last week when I went to get my hubby a soap for his shower, I picked up a tester I had made from this batch. (I made a second batch also with less milk, which smells much more pleasant)  Holy Hannah, did that smell sour!  I made my hubby smell, and he promptly threw the bar in the garbage.

I am worried about using milks in my soaps after this horrible experience, not knowing whether I am just very sensitive to milk now since I haven't been eating dairy lately, or if it was something I messed up.  I did a little research, asked some questions on the Teach Soap Forum, and got some answers.  

It seems that I probably used too much milk in the recipe, and I am likely sensitive to the milky smell.  I will wait for awhile before I'm tempted to try milks in my soaps again.

On a more positive note, though, I did find a fantastic winter recipe I have been using for the horribly dry and bitterly cold winters we have up here in Minnesnowta, and I will get pics and a blog about that shortly!

Hope you all are staying warm!

Monday, December 17, 2012

Birthday Soaps!

Short blog post y'all - I have made some "spa" type soaps for my birthday:

Here's the one I made with a friend yesterday with pistachio and shea butters, avocado, babassu, sunflower, castor, coconut and olive oils (cleaning out the mostly-empty bottles), and silk and scented with my first essential oil blend with eucalyptus, lavender, bergamot, orange, and clove.  It smells divine, and I can't wait to see how this turned out.  I agreed to not cut it until my friend can come over again for New Years...  I hope I can wait that long :)


The one I made today for my birthday is with a FO that smells like Bath & Body Works' Coconut Lime Verbena and is made with silk, mango butter, and avocado, olive, coconut, and castor oils.  I am really excited about this one - it looks so pretty in the mold!


Well, off to continue birthday celebrations with my husband tonight - hope you all have had a great Monday!

~Chrissy

Thursday, December 6, 2012

Shaving Soap Recipe

My husband and I gave my dad a shaving set for Christmas last year.  When I started making soaps, I really wanted to learn how to make shaving soaps for him to use with his brush and razor.  These are great holiday gifts for the men (and women!) in your life - using the shaving soap with a brush not only gives a really creamy, stable lather, which is useful for shaving, but the brush makes the hairs stand up (on face, or even on legs) to get a closer shave.  I've made the soap in mugs I found at Goodwill and attached a shaving brush I found at Walgreens for a cute holiday gift for friends and family.


I make my soap in the crockpot, with a mix of sodium and potassium hydroxide.  Here's the recipe I use, found here:

165g Beef Tallow
165g Stearic Acid
100g Coconut Oil
70g Castor Oil

180g Distilled Water
65.6g Potassium Hydroxide
25.2g Sodium Hydroxide

1 Tbsp bentonite clay
1 fl oz FO - My last batch was BB Earl Grey Lemon FO, both men and women like the scent (and even one of my dogs :) )


When the oils are combined and the lye water solution is added, the soap batter gets thick quickly.  I usually use a spatula to mix, rather than my trusty stick blender.  I add the bentonite clay after the batter is thoroughly mixed, because the bentonite clay LOVES water and will thicken the batter up considerably.  Then I dump in a crock pot on low and wait for 1-3 hours until it's fully cooked. Even though these are hot-process, I like to let them cure for at least a week before using.

I have made the soap in BB's column mold, but it's extremely hard to unmold, because the soap is more of a very soft soap, almost a cream soap.  It's firm enough to keep its shape, but the users of the soap may find it easier to use if it's poured directly into a mug or saucer to make using the brush easier.

Since the bentonite clay loves water, you'll have to work a little bit and keep wetting the brush, but the lather is amazing.  Check it out :)  It will stay for a really long time on your face / legs, too!


Even my dad loves the soap:


I've been keeping myself busy the past couple days with the new Soapmaker 3 software I got for an early birthday present.  The CPA in me is really enjoying getting my inventory and recipes documented and figuring out exactly how much each of my soaps is costing me (and my wasted batches, like the lye-heavy batch from the last post).

~Chrissy

Wednesday, December 5, 2012

Lye crystals vs soda ash

When I first started making soap, one thing I was really unsure about was how to tell the difference between soda ash (which is not harmful, but may affect appearance of the soap) and lye crystals (which are definitely harmful and would indicate the soap is lye-heavy and needs to be properly disposed of).  From what I had read, they were both white and formed kind of crystal-like on the tops of soaps as they cured.  Each time my soaps cured for the first few months, I would approach the soap with a fair amount of trepidation, lick my finger, touch the white crystals, and touch my tongue and wait to see if I got a *ZAP* like a 9-volt battery.

Perhaps these pictures will help others identify what white stuff on soap is safe and cosmetic only vs what is very dangerous.  I was trying to use up some oils that I'd had for a half year or so before they started to spoil, and I had gotten some Moroccan Red Clay in the mail, as well as some silk.  I wanted to make something moisturizing and gently exfoliating for the dry Minnesota winter coming up, and I had the evening by myself, so it was a perfect time to get down in my "lab" and play around.


So, I'm still not 100% sure what went wrong, but I am worried that I mis-measured the lye.  My husband helped me set up a soapy lab downstairs so I don't have to drag everything up to the kitchen each time I want to soap.  However, the light in the basement makes the scale a little tricky to read, so I have a feeling I just misread my digital scale and had way too much lye in this soap.

Here's the soap I made with the lye crystals.  It has also leaked lye-heavy liquid while it was curing, but that seemed to have seeped back into the mold by the time I took this picture.  See how it looks kind of spotty and crystalized?  Some of the whiter areas are where they lye liquid dried.


Here's a photo of some sample soaps I cut of a peppermint EO soap that had some pretty significant soda ash.  See how it looks less like crystals and more of a uniform "ashy" kind of white substance?


Here's a photo of both together (pardon the mess of my soap factory (and the quality of my pictures - taken on my iPhone with the previously-mentioned terrible lighting).

Here are the swirls from my caustic soap.  I'm so bummed I have to trash this batch!  The swirls turned out so pretty :(
At least I know the soap has great bubbles!  Check this out when I was cleaning out the mold!
So, time to toss this batch and try again.  I have wanted to play around with the BB Column Mold since my struggles unmolding my cream shave soap (I ended up hacking off the end with a small axe...).  Maybe this will be the soap for my second go with the column mold?

Happy Repeal Day!  Hope everyone is enjoying a cocktail tonight to celebrate the end of Prohibition :)  I am enjoying a Guinness and watching Bootleggers on TV!

~Chrissy

Tuesday, November 27, 2012

I'm back!!!

Hey everyone - I've had a really long hiatus from this blog (and from soaping), but for some good reasons...

I have mentioned before about my upcoming wedding, and I was away for a few weeks for the wedding and honeymoon at the amazing Atlantis in the Bahamas!  It was an absolutely phenomenal time - we couldn't have asked for better weather for us and our guests.  We got there a few days after Sandy blew through, and even though Sandy did some damage on the beach we had chosen, we were able to upgrade to an even better beach to have our ceremony.  My husband's uncle conducted the ceremony, we had steel drums for music on the beach, and we had the most amazing food and music!  I had such a good time, and I know everyone else did, too!

We had some phenomenal vendors for our wedding, including wedding planning by Gretchen Culver at Rocket Science Weddings and Events, hair and makeup for the ladies by Brett Dorrian Artistry Studios, photography by Studio Laguna, amazing flowers by Wildflowers in Nassau, and the best wedding music ever (even though I *may* be biased...) by DJ Jose in Nassau.  It was an amazing time!

Then, my new husband and I returned home for a week before we headed off to Detroit for his birthday and Thanksgiving celebration with his family.

Whew!  That's a whole lot of travel in the past month and a half, and I am ready to get back in the swing of things here.  I am working on some new soap recipes with some new fun ingredients I have gotten recently - including hemp oil, pistachio butter, and silk - and trying out some new techniques.  I cannot wait to get back into soaping!!  Have to get my stock back up for all the holiday gifts coming up :)

Here's one picture from our incredible wedding from Katrina at Studio Laguna:


~Chrissy

Wednesday, October 17, 2012

Hot Process, part deux

OK.  Yesterday was kind of a stressful day.  Maybe I've just been worrying about my wedding in about 10 days, or because I haven't slept well in a few days (due to poor Hobbes' non-stop intestinal distress), or I just was having a worrying day in general, but I thought making some soap would help calm me down and set me back on track.

So, I decided to make the following soaps:  re-try the hot process recipe from yesterday's post, make a vertical-mold white and blue soap with BB's Fresh Snow fragrance, and try out some natural colorants with BB's Applejack Peel FO.

Let's start with the first soap I made - the hot process soap, part two:


 I made the soap using the same recipe as the first batch, but I resized it to fit my 2 lb loaf mold, rather than put it in the cavity molds like I did last time.  I also used less ultramarine blue to try to get the soap to be more purple-y.  I loved the color in the crock pot!  I also used some sodium lactate to try to get it to harden better.
Hooray!!  It set up overnight!!  I was able to unmold it this morning, and snap this pic with the very early light in the dining room today.  The color lightened up significantly, but I still like it.  And I really like the lavender / bergamot EO scents I used.  The top is kind of rough-looking, but the sides really surprised me with how flat and clean they turned out to be.  I may try to do this more often!

Now for the trouble soaps.  Soap #2 - I wanted to make a Celine swirled soap (see blog of the inventor of this swirl here).  I have some madder root and burdock root that I've been wanting to play with, so I did an infusion of each in olive oil.  2 tbsp of madder root in 1 cup of olive oil and warmed in the microwave, and 4 tbsp of burdock in 1 cup of olive oil and warmed in the microwave.  The burdock root made a light green, so I may have to play around with that some more to see if I can get it to be a more distinctive green, but the madder root was a beautiful color.

I was talking with my fiance and soaping and not really paying a ton of attention to what I was doing, apparently, because after I had swirled and finished the soap, OH CRAP, I forgot to put in the FO.  Ugh.  So, it's now a red, green and white swirled soap that is naturally colored and unscented.  
 Here it is swirled and in the mold.  I think it will look beautiful, and I got to play with colorants, so it's not a wasted soap!
Here's what the colors looked like - I remembered to take a photo only after I had started to pour the soap into the mold.  Madder root on the top right, burdock in the lower middle, and plain uncolored soap on the top left.  Will post pics of the cut soap later.

Soap #3.  I had in mind to make a beautiful swirled soap with BB's Fresh Snow fragrance oil using the vertical mold and slowly twisting the divider as I pulled it out of the mold.  I mixed the oils and put some super pearly white mica in the oils before I added the lye, to see how it would look.  Here is the beautiful pearly oil mix in the pot:
I then added the lye, divided into two parts, and added a tiny bit of ultramarine blue in one part to color it a delicate, shimmery blue.  I stick blended, and got the help of my fiance and  poured into the divided vertical mold. I twisted the divider and felt awesome about how the top looked.

Are you noticing something *missing*?  YES.  THE FRAGRANCE.  AGAIN.  So, instead of having 2 unscented soaps tonight, I scented the leftover soaps that didn't fit in the vertical mold, poured the contents of the mold into the pot and did an in-the-pot swirl.  Poured it back in the vertical mold again and the leftovers into cavity molds.  I am really disappointed.  What was supposed to be sparkly and delicately swirled, like fresh fallen snow, looks muddy.  I like the smell, though, and it was another new recipe, so it will likely be a "tester" batch for my squeaky-clean team of feedback providers.

What a night!  I am glad I have to wait a few days to unmold this one, because I don't think I can look at it right now. Maybe in a few days I will be better able to evaluate this one.  I know we should always have plan B's when soaping, and not to get too attached to a design, and this was a tough lesson for me.

Better luck next time!

~Chrissy