Background

Showing posts with label natural colorants. Show all posts

Wednesday, August 7, 2013

New Soaps (and gratuitous dog pictures)

Wow - time really flies!  I can't believe it's been so long since I've sat down and written a blog post.  I always tell myself I want to be more disciplined about this kind of stuff, and of course once I've made a decision to do something regularly, I no longer want to do it :)

I wanted to showcase my new soaps that I've made in the last month or so, but before I do, here are some spontaneous pictures I got of Hannah & Hobbes earlier today when they were investigating soap I was planning to photograph.  I guess they're not the Lead Soap Sniffer and Lead Soap Investigator for nothing!


Hobbes was laying in the sunbeam, looking so adorable, I had to try to get a picture.

Soon, Hannah came over to investigate why I was paying so much attention to Hobbes.

She had to prove she could do model poses, too :)


My two-headed dog monster

I love it when Hobbes does that head tilt thing.  It's like he's saying "Well, Hannah is how she is, what can I do?"

Now that those photos are out of the way, here are some pictures of soap :)


This one is a Black Raspberry Vanilla swirl - I wanted to try the feather mantra swirl - I am pleased with how it turned out!
I tried out two manly fragrances - Barber Shoppe and Santa's Pipe from WSP.  
Barber Shoppe accelerated trace on me a ton, but I was able to tamp the mold many, many times to get the layers to stick together and eliminate as many air bubbles as possible.  They are really only visible on the sides.  

Kris loves this scent, but my favorite is the Santa's Pipe - it's the first time I worked with a vanilla stabilizer, due to the high vanillin content of this fragrance.  This soap makes me happy that I make (and can keep) as much soap as I want - I am absolutely in love with this fragrance, and I may not share with anyone else :)


It's a perfect cherry tobacco scent - comforting, but not smokey.  I'm definitely reordering this fragrance!

Hope everyone is enjoying their Wednesday!

~Chrissy

Tuesday, May 28, 2013

Soap Volcano!!

I took some time this holiday weekend to catch up on some soap ideas I have had drawn out but haven't had time to make.  My first three batches turned out just as I had wanted them to - I'll write a post later when I have time to clean them up and get some good light for photos.  

The troublemaker was the next batch I attempted to make.  My fourth (and last) batch of the night was a remake of a hot process lavender soap with alkanet root.  I make it in my BB vertical mold, because I like that it keeps all of the edges nice and smooth, even though it is hot process.

{warning - this may or may not be a boring post - I didn't think to take any photos of this process, so it's going to be a "pictures with words" post :) }

I had run out of bowls and equipment to infuse my soaping oils with the alkanet root, so I had the brilliant idea to just infuse the alkanet root using my crockpot while I was working on my other soaps.  The infusion went great, although I needed a second pair of hands to help me strain out the alkanet root powder (thanks Kris!).  The oils were super hot, and I put them back in the crock pot to stay warm.  I mixed my essential oil blend and put it the table next to the oils so I didn't forget to put it in the oils.  Two seconds later, I knocked the cup over, and the whole soaping area still smells like lavender.  I suppose it could be worse - it could smell like neem oil!

The oils were HOT, though - around 180 degrees!  Since the soap batter over 200 degrees while it's cooking, I had the brilliant idea to just mix the 170 degree lye mixture with my 180 degree oils to save myself some time.  Luckily, I stayed by the crock pot to clean up after I had stick-blended the lye and oils, because less than 10 minutes later, this mixture of blue-purple beads started to volcano out of the crock pot and spill EVERYWHERE!  So, I yelled for my husband, stirred the soap back down into the crock pot, and took a couple deep breaths.  I also turned the crock pot down to low.

Luckily, the soap in the crock pot kept cooking and went through the normal phases.  It eventually didn't zap, and I got it in the mold without a problem.  I guess all's well that ends well, eh?

I've never seen a soap volcano, though, and I've definitely learned a thing or two from that harrowing experience!  If only I'd had the presence of mind to grab my camera so I could record it for posterity.  Hopefully I don't have another volcano to record...

~Chrissy

Thursday, April 11, 2013

Soap Challenge 2013 - Elemental Swirl

For week 2 of the Soap Challenge, the technique is the Elemental Swirl.  Here is the link to her blog with the pictures of other soaper's creations as well as a little more info on the Elemental Swirl.

I really struggled with what to do with this elemental swirl.  I wasn't sure about the colors to use (I have a relatively limited selection of colorants - mainly oxides, micas, and natural colorants).  I wasn't even sure about what scent I wanted to make.

So, I looked at DesignSeeds for some inspiration:

Inspiration photo from DesignSeeds at:  http://design-seeds.com/index.php/home/entry/flora-tones20
I love these colors, and I figured I could get close enough with the colorants I have.  For scent, I have had a spearmint and ginger EO blend on my list of things to try.  To balance it out a little more, I added some coriander EO I had laying around (This is a very expensive soap - these EOs aren't cheap...)

I rolled up my sleeves, turned on the Elton John Pandora station on my computer downstairs and started creating.


Here is the soap log before and after cutting.  I really love how the colors turned out!  I didn't have very high expectations for this soap, but it was really fun to do, and I like how it turned out.  The "green" smell of the EO blends and the flower-like colors really make me wish spring was here already.


Here are some of my favorite shots of the cut soap.  The swirls turned out great, but I wish I had poured a little more forcefully to get a wavy pencil line.


One more for good measure:


The colors aren't exactly like the DesignSeeds palette above, but I am proud of how this soap turned out!

~Chrissy

Wednesday, March 20, 2013

Salt Bars (with safety update)

Up until recently, the only divided molds I have had are fancy-design cavity molds.  This is fine for regular soap, but I wanted to try my hand at salt bars.

Jenny at Lather Be Soaping posted this tutorial on salt bars, which explains a lot about why coconut oil (and the high percentage) and other things - definitely go and check out her post for more information and some pics of a beautiful bar of soap.  I wanted to try out making my own bars, and I got my hot little hands on some pink Himalayan salt to use.  My husband uses Himalayan salt blocks to cook steaks (which are delicious, by the way!), but I went and bought medium-ground salt for my soaps :)

I used the same recipe Jenny uses on her blog:
80% coconut oil
15% avocado oil (I love avocado oil!  I use it in all my recipes)
5% castor oil

I superfatted at 20%, since such a high % of coconut oil can be very drying.  My problem was understanding how to size this recipe.  I wasn't sure whether the salt would dissolve into the recipe or if it would add additional bulk to the recipe, so I sized it to fit a 9-bar mold for bars that were 3.5"x2.5"x1.25" (or approx 40 oz oils).  I added 36 oz of salt to the recipe at trace, since you can use a salt weight of anywhere from 50%-100% of the weight of the oils used.

I definitely over-produced :)  The salt does add additional volume to the bars (duh in retrospect), and it made nearly double what I was looking for.  Therefore, I needed to cut the bars in half to get them to a size that can be held (and used).

Here's a pic of the soap being mixed:
The salt didn't mix in as well as I thought it would...  I had to do the same thing as Jenny and switch to a whisk.  MUCH easier after that :)
Here it is in the slab mold before I put in the dividers.  One note on sliding in the dividers - I don't think I pushed hard enough on the dividers, and there was a layer of soap stuck underneath the dividers when I tried to unmold.  I haven't had this happen on my other soap recipes in this mold - may have been the thick batter and saltiness.
Love that pink color!
And here are the cut bars.  They got pretty crumbly around the edges when I tried to cut them.  I waited about two hours until they were solid-feeling (but still warm), and then cut with my miter box.  The soap was much crumblier than I had anticipated - probably because of how much undissolved salt was in the bar and I may have needed to cut them a little sooner...
The color is nice, but all the edges are kind of crumbly.  A couple days after cutting, though, and already the lather is feeling lotion-like.

I have a feeling that even though the salt bars may have won this round, I am going to win the battle!  (muah haha)

SAFETY UPDATE:  I realized after this posted that I am showing a picture of my bare hands with the caustic soap batter above.  When I soap, I follow the safety precautions prescribed by numerous blogs, including Soap Queen (Google cold process safety procedures if you're new to CP soaping and want to try it out).  I had removed my gloves to grab my camera to take this picture so that I wouldn't get soap batter on my camera from my gloves.  I just forgot to put the gloves back on for the picture.  Any soapers that are new who want to try this recipe, PLEASE PLEASE follow good safety practices for soap making.  


Listen to Sweet Brown - Lye Burns: Ain't nobody got time for that! :)


~Chrissy

Monday, March 18, 2013

New weekend soaps

I am working on a post on the new Soap Hutch mold I got recently to talk all about this amazing multi-purpose mold that Rich made for me.  He has been such a pleasure to work with and great at communicating on details of the mold.  I will get into the features of my great Christmas gift in the blog post I'm working on, but for now, just know it's awesome :)

So, since it has a 9-bar divider function, I wanted to utilize it and also play with a chopstick swirl.  One of the nice things about this mold is that it's 4" tall, so each of the 9 divided sections can hold up to 3 bars of soap, or 27 bars total in one mold!  This means that the bars that I swirled had additional layers of depth and design - I really enjoyed seeing how the middle bar of each 3" block turned out.


The blocks all looked so grey from the activated charcoal I used for one of the colors.

Check out how great the swirls inside look:

And the scent is heavenly (Black Raspberry Vanilla).  I did notice, though, that on the tops of some of the blocks, there was this strange yellow-ish color developing in the white portion.  I'm not sure what caused that, since the color didn't make it through the entire block - it was only on the top bit that was exposed to air.  I really struggled getting the soap blocks out of the mold, because the liner on the bottom of the mold was stuck to the plastic bottom of the mold - it took me forever to separate the liner from the mold.  The swirls turned out so beautifully, though, I will definitely use it again!

I also made a hot process lavender soap in my trusty old crock pot.  I have a lot of trouble getting the tops to look smooth with HP, so I poured it into BB's vertical mold to keep all the sides flat and even.  I colored it with alkanet root infused in olive oil (3 heaping teaspoons in 12 oz olive oil).  I was worried about the color, since it was red-looking when I infused the OO over heat, the color turned a pretty purple when I mixed the soap batter, and it became an ugly grey color when it was cooking in the crock pot.  I wish I had thought to take pictures of the colors.  I will make another batch soon and will take pictures to show off the weird color morphing.

The final color ended up pretty great, though - I apparently was having a purple weekend, which was fitting that the Prince station on Pandora was my soaping music :)  I love purple and the Purple One!


I love this color - you can see the change from when it was first cooked (in top left) over a few days curing.  Gorgeous, if I do say so myself!
I need to work on a few more blog posts on the Soap Hutch mold as well as a salt soap I could finally make with the divider mold.  Expect more soon!

Happy Monday - 

~Chrissy

Tuesday, February 26, 2013

Newest Soaps

I have been pretty busy in my soaping area recently - I finally figured out a recipe I really like, even though it seems a little expensive, and I've been working on making some new soaps that will be using a consistent recipe format.

My first soap I made is slightly different than my new "standard" recipe - it's a very gentle soap for some friends who want uncolored, unscented honey soaps.  It contains honey, beeswax, mango butter, avocado oil and colloidal oatmeal (among other things).  It was created to be palm- and coconut- free.


Normally, I try to avoid power circles, but I think it looks pretty cool here with the stamp :)
I also was feeling the winter blahs, and I was out of stock of my Sunshine soap (scented with Yuzu FO and Orange EO), so it was time to bring some citrus into the house and improve our moods.  I felt so much better after making this soap!
Just looking at the bright colors makes me happy!  There are poppy seeds in the white portion for some exfoliation.
I also wanted to try to make a facial soap - I'm getting close to out of the cleanser I currently use, and I figured I may as well try to make my own!  I got this recipe from Amanda's blog at Lovin' Soap.  It has a bunch of really great-sounding ingredients, which I happened to have on hand:  avocado and babassu oils, mango butter, activated charcoal and lavender essential oil. Here is her recipe - I resized the recipe to fit my column mold, but I calculated wrong and ended up with a bunch of extra soap batter, which I poured into my cupcake molds for individual-sized soaps:


Avocado oil – 4 oz

Babassu oil – 8 oz
Castor oil – 2 oz
Mango butter – 4 oz
Olive oil – 12 oz
Rice Bran oil – 2 oz
Water – 9 oz
Lye – 4.35 oz
1/2 Tablespoon Charcoal


I wanted to make it a little swirly, so I put the charcoal in about 2/3 of the recipe and then swirled it in the mold. I also had bought some 3" column mold liners from her, since I've broken the bottom of my BB mold. The swirls weren't uniform throughout the mold - as you can see the bottom of the mold was much darker and the top of the mold got the nice light swirls. I like both looks, though, and I can't wait to try out this soap!


I also tried to make a dog shampoo for my two little yorkies - I'll post the recipe and pictures later. The recipe uses neem oil and an EO blend. It doesn't smell too neem-y, and I am excited for it to cure so I can give it a whirl!


Also, I am feeling more proud of my pictures - all of these pics are still taken on my iPhone, but I downloaded the Camera+ app and have been making better use of PhotoScape to crop pics.  I am still having trouble with resizing the widths so they appear uniform in my blog.  I'll figure it out eventually :)

Here's what my table looked like while I was taking the pictures above.  Gotta love being able to crop :)


~Chrissy

Friday, February 1, 2013

My favorite soap!

I am so excited - I think I've found a soap recipe that is perfect for the dry, scratchy winters we get here in MN.  I still have to use lotion about half the time after showering (maybe because I like the showers HOT, since the weather and the house are usually freezing in the morning when I wake up).

I was playing around with some pistachio butter I picked up from Brambleberry when it was on sale as well as some sunflower oil that I had hanging around, and came up with this:  (cue angels singing...)

OK, ok, this is not the most awesome picture I have ever taken or posted.  Just imagine the best possible version of this soap, with beautiful colors and swirls, clean edges, and an awesomely (lightly) scented with BB's Cranberry Fig FO.  I really need to learn more about lighting and photoshop...

Oh soap, how do I love thee?  Let me count the ways:

  1. The lather lasts the perfect amount of time with my sponge.  I only have to load up my sponge once to get my whole body.
  2. The scent is nice and refreshing, but not overpowering.
  3. My skin feels so lovely and soft when I step out of the shower.
  4. The charcoal and clay are exfoliating, but not in a scrubby way.  I can't use scrubby soaps in the winter - it gives me either really dry skin or rashiness.
  5. The bar lasts a very long time, even with nearly daily use.
  6. It was surprisingly inexpensive to make.
  7. I could probably go on and on, but 7 seems like a perfect number to end this at :)
I am so excited about this recipe!  I am going to try it out with some different designs, colorants and fragrances now to see how it behaves in other situations.  I also received an order of babassu oil in the mail this week, so I will probably work that in here, since it's such a great non-greasy emollient.

Sorry for the pictures - I'll start working on better quality photos going forward, but happy soaping everyone!  Stay warm...

~Chrissy

Wednesday, October 17, 2012

Hot Process, part deux

OK.  Yesterday was kind of a stressful day.  Maybe I've just been worrying about my wedding in about 10 days, or because I haven't slept well in a few days (due to poor Hobbes' non-stop intestinal distress), or I just was having a worrying day in general, but I thought making some soap would help calm me down and set me back on track.

So, I decided to make the following soaps:  re-try the hot process recipe from yesterday's post, make a vertical-mold white and blue soap with BB's Fresh Snow fragrance, and try out some natural colorants with BB's Applejack Peel FO.

Let's start with the first soap I made - the hot process soap, part two:


 I made the soap using the same recipe as the first batch, but I resized it to fit my 2 lb loaf mold, rather than put it in the cavity molds like I did last time.  I also used less ultramarine blue to try to get the soap to be more purple-y.  I loved the color in the crock pot!  I also used some sodium lactate to try to get it to harden better.
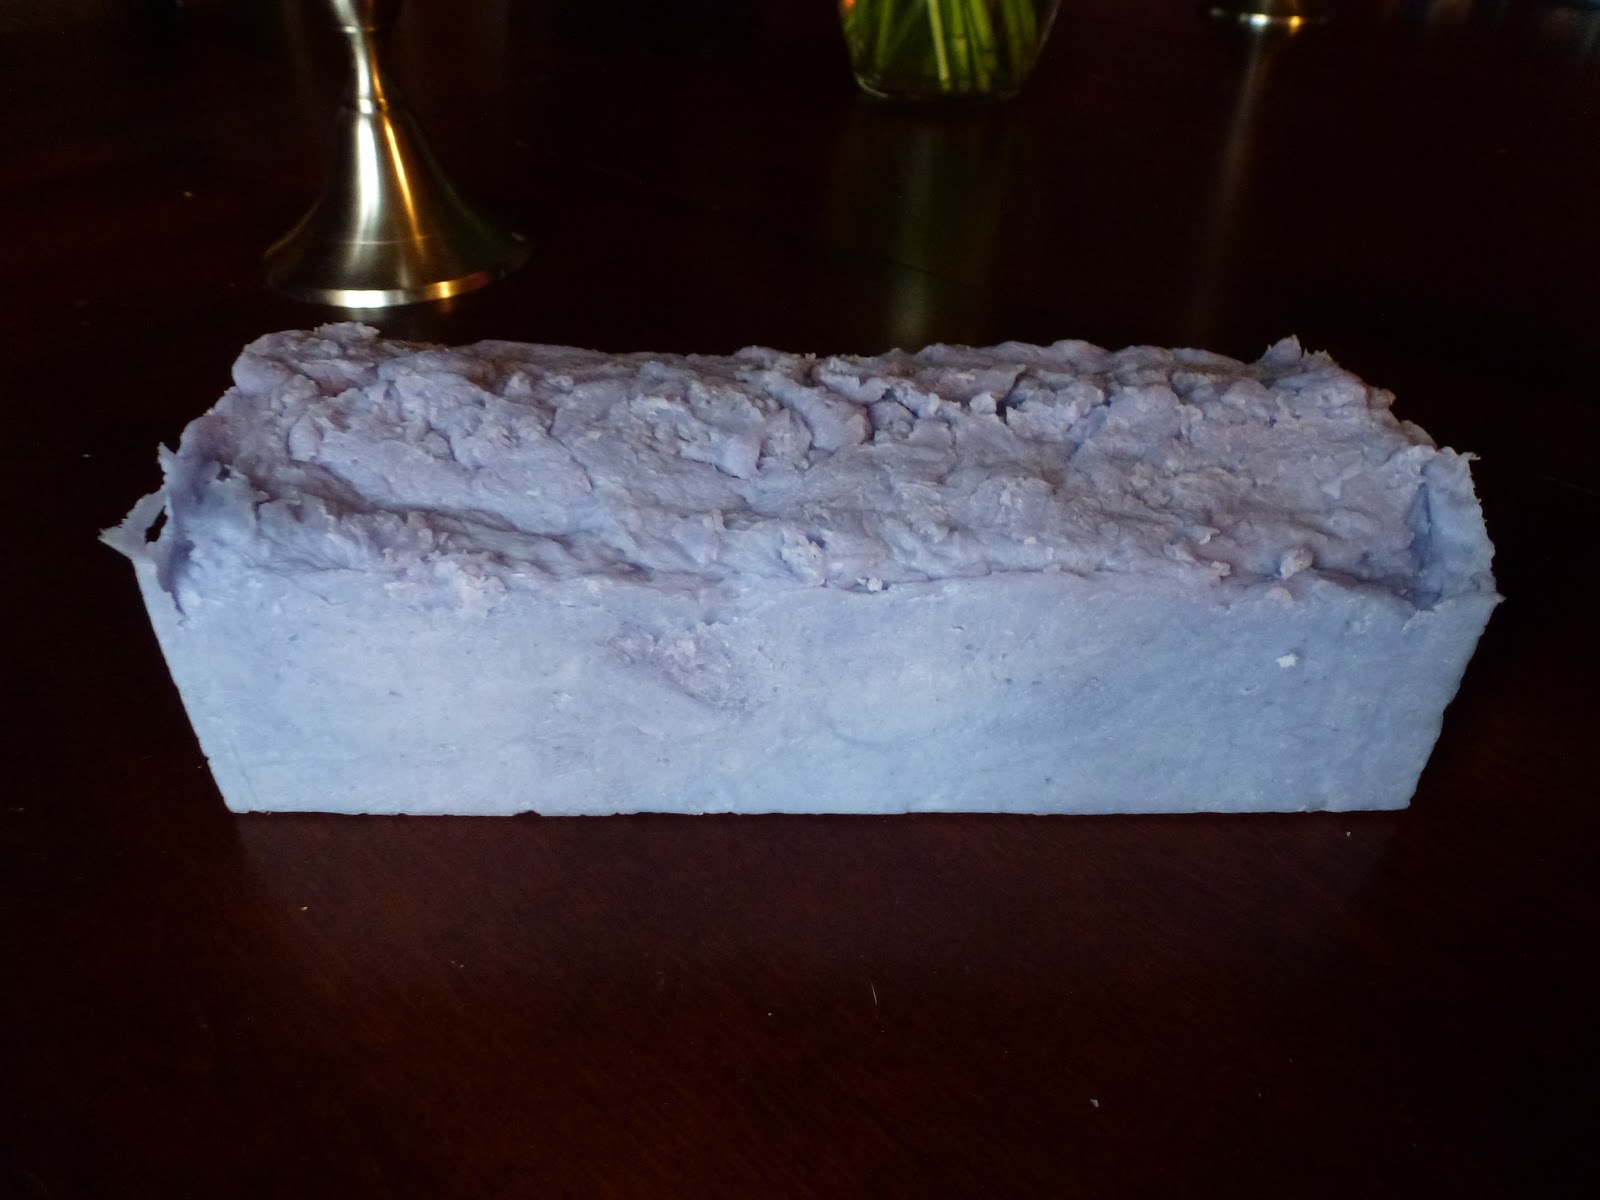
Hooray!!  It set up overnight!!  I was able to unmold it this morning, and snap this pic with the very early light in the dining room today.  The color lightened up significantly, but I still like it.  And I really like the lavender / bergamot EO scents I used.  The top is kind of rough-looking, but the sides really surprised me with how flat and clean they turned out to be.  I may try to do this more often!

Now for the trouble soaps.  Soap #2 - I wanted to make a Celine swirled soap (see blog of the inventor of this swirl here).  I have some madder root and burdock root that I've been wanting to play with, so I did an infusion of each in olive oil.  2 tbsp of madder root in 1 cup of olive oil and warmed in the microwave, and 4 tbsp of burdock in 1 cup of olive oil and warmed in the microwave.  The burdock root made a light green, so I may have to play around with that some more to see if I can get it to be a more distinctive green, but the madder root was a beautiful color.

I was talking with my fiance and soaping and not really paying a ton of attention to what I was doing, apparently, because after I had swirled and finished the soap, OH CRAP, I forgot to put in the FO.  Ugh.  So, it's now a red, green and white swirled soap that is naturally colored and unscented.  
 Here it is swirled and in the mold.  I think it will look beautiful, and I got to play with colorants, so it's not a wasted soap!
Here's what the colors looked like - I remembered to take a photo only after I had started to pour the soap into the mold.  Madder root on the top right, burdock in the lower middle, and plain uncolored soap on the top left.  Will post pics of the cut soap later.

Soap #3.  I had in mind to make a beautiful swirled soap with BB's Fresh Snow fragrance oil using the vertical mold and slowly twisting the divider as I pulled it out of the mold.  I mixed the oils and put some super pearly white mica in the oils before I added the lye, to see how it would look.  Here is the beautiful pearly oil mix in the pot:
I then added the lye, divided into two parts, and added a tiny bit of ultramarine blue in one part to color it a delicate, shimmery blue.  I stick blended, and got the help of my fiance and  poured into the divided vertical mold. I twisted the divider and felt awesome about how the top looked.

Are you noticing something *missing*?  YES.  THE FRAGRANCE.  AGAIN.  So, instead of having 2 unscented soaps tonight, I scented the leftover soaps that didn't fit in the vertical mold, poured the contents of the mold into the pot and did an in-the-pot swirl.  Poured it back in the vertical mold again and the leftovers into cavity molds.  I am really disappointed.  What was supposed to be sparkly and delicately swirled, like fresh fallen snow, looks muddy.  I like the smell, though, and it was another new recipe, so it will likely be a "tester" batch for my squeaky-clean team of feedback providers.

What a night!  I am glad I have to wait a few days to unmold this one, because I don't think I can look at it right now. Maybe in a few days I will be better able to evaluate this one.  I know we should always have plan B's when soaping, and not to get too attached to a design, and this was a tough lesson for me.

Better luck next time!

~Chrissy