Background

Showing posts with label oops. Show all posts

Wednesday, August 21, 2013

Rebatching Salt Bars - a mostly picture-free tutorial :)

Sometimes when things go wrong, I just don't want to document that I've had a "learning opportunity".  I regret that choice in this case, because I learned a lot through my salt bar mishap.  I will try to paint you pictures with words for this tutorial.

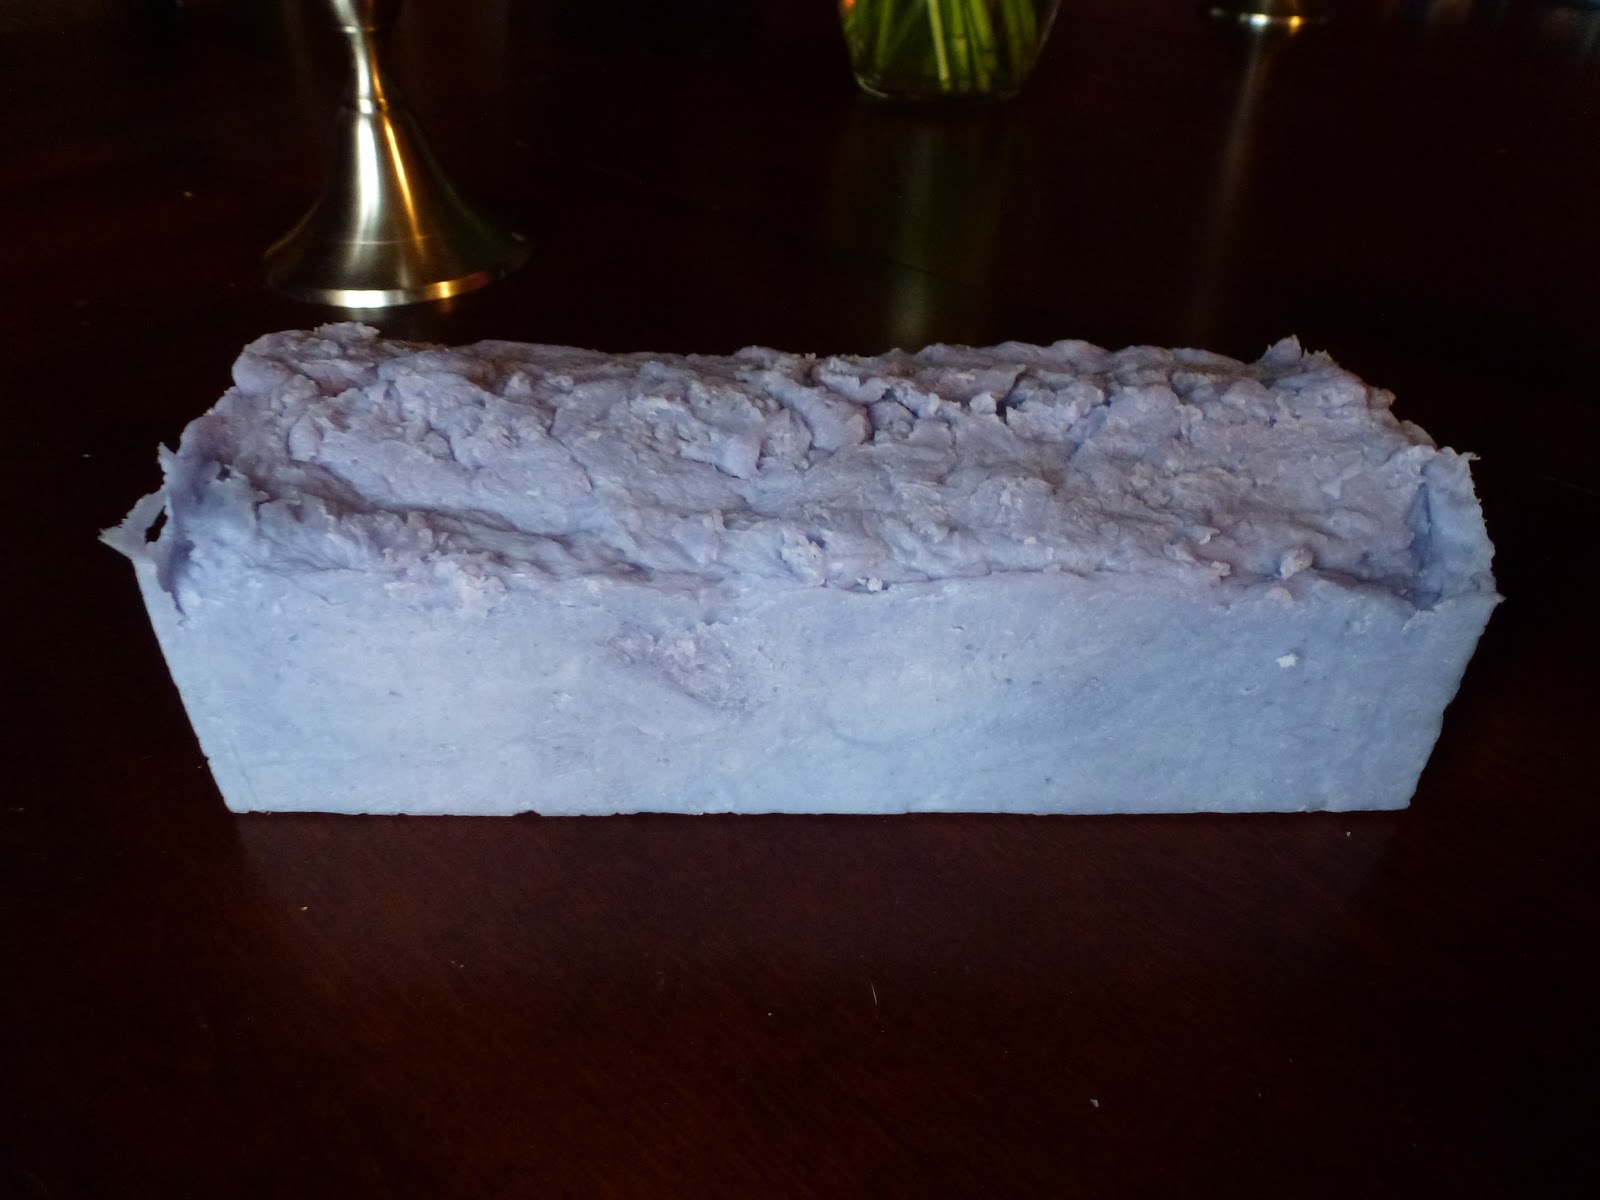
I made a loaf of salt bars one weekend morning.  I knew they'd be ready to cut in 2-5 hours, but I had only 2.5 hours before I had to leave for the weekend.  I was using a Brambleberry 5 lb mold with a sliding bottom and a silicone liner so that I had nice, crisp edges.  I slid the soap and liner out of the mold before I truly realized how soft it was!  I tried to maneuver everything back into the mold, but half of the soap ended up sliding up and out of the mold, creating a really tall mess of soap.

Since we were in a hurry to leave for the weekend, I let the soap blob sit and figured I'd think of something when I got home the following day.  I did a lot of research on rebatching salt bars, but I seemed to only find instructions to crumble up the bars and use them in new soap batches.

I decided to try to rebatch in my crockpot, just to see what would happen.  Since I had tried to rebatch only about 30-35 hours after I made the bars, they were not rock hard yet (my recipe is 80% coconut oil, 15% avocado, 5% castor, and 60% salt to oils - I think this lower percentage of salt kept the bars softer a little longer).  I salvaged the half of the recipe that stayed in the same shape as it was poured.  I painstakingly crumbled up the blob, stuck it in a crockpot on high, and let it sit for a half hour.  I didn't add oil or water, since the bars were so fresh.  Checked after a half hour, and it looked exactly like when I first put it in.  Checked in another half hour.  No change.  Kept checking, and *finally* 3 hours later, the soap had completely melted and was in a perfect consistency to put in a mold.  I made sure to mix up the melted soap again before I stuck it in the mold.  A few hours later, it was ready to be cut.

What's cool is that it's very difficult to tell the rebatched salt bars from the original - the soap melted so well there were no textured pieces remaining to give away the fact that it was rebatched!  I don't plan to rebatch salt bars going forward, but it's nice to know it can be done!  I have only tried with relatively soft, fresh soap - I'm not sure whether this would work for older, more cured bars, though - if anyone has tried, I'd love to hear about it!

The soap on the left is the rebatched salt bar - the one on the right is what I was able to salvage before The Rebatch.
The rebatched bars also seem a little less crumbly than the original bars after they've been curing for a few weeks, but otherwise, I don't notice a difference between the two, which is awesome!

~Chrissy

Thursday, June 27, 2013

Lye Safety and New Soaps!

My former set up for soap making was in a room with a cement floor using a relatively flimsy wooden base with a door on top laid flat for the working surface.  It was mostly level and mostly sturdy, and it was nice and wide so I had room for all of the dishes needed for my soap.  I knew I needed a better set up, but I had been dragging my feet on building something different.

I say that in the past tense, because recently I had a pretty scary lye spill that forced me to be more proactive on building a sturdy soap work bench for myself.  I set the container with my lye solution on the part of the table where the hinge of the door was on accident, and it spilled EVERYWHERE!  What's worse is that Hobbes was also with me, and when I yelled at him to get out of the room, he got so scared and curled up into a little ball.  So, I took gloves off and brought him out of the room, and went back to control the damage. As everyone hopefully knows by now, lye solution is very dangerous - the lye solution completely ate the paint on the floor where it spilled!  For anyone who has been feeling lax about lye safety - let this accident be a warning to everyone to continue to exercise good caution around lye and raw soap.

So, luckily I (and Hobbes) were unharmed, and the only real damage was to the floor paint.  I researched and found this work bench plan, and bought the hardware to make it.  I enlisted the help of my husband and dad to build this "two hour" bench.  Probably an experienced carpenter could make this bench in two hours, but not me.  I cannot tell you how many trips I had to make to the hardware stores nearby.  I kept going to different ones so that the employees would't recognize me :)  I powered through, though, and got it done!  I feel so good about myself now that this is built and level!

Here is the final product - I can't wait to start creating again!!  This bench is great - it has a 6" long work surface with 2 shelves, it's really sturdy and can hold a significant amount of weight, and I have a cool hanging light that I was able to attach right to the bench for plenty of light as I'm creating.  Best of all, the design created nearly no waste of wood!


My favorite part is the counter top I found for the workbench surface.  It raises the bench up another inch, which makes it more comfortable for me.  The bench is 30" deep and has 4" wide ledge in the back, but the counter top is only 24" deep and has a ridge in the back.  This makes it a perfect place for me to put the containers with lye or fragrances out of the way so they don't get bumped and spill everywhere.  Love it!

Before The Spill, I was playing around with some more design ideas for the Pinkberry Mimosa FO that I've really loved lately, and here is a Tiger Stripe version with heart embeds:


I'm glad the Tiger Stripe came out well - I want to make a signature soap for Hannah and for Hobbes, and I thought it'd be fun to have something tiger-related (either color or pattern) for him.

Happy Thursday, everyone!

~Chrissy

Friday, June 14, 2013

Equality Soap 2.0

I'm sorry it's taken so long to post pictures of my two newest soaps, but I've been working on making my own light box (blog post on that to come...) and simply haven't gotten around to it.

For the Equality Soap, I was disappointed that the green color morphed in the cold process soap.  Even though the site where I purchased the colorant said it was safe in high PH products like cold process soap, it just didn't do what I wanted.  I have had good luck with BB's Green Chrome pigment, and I had previously made a number of small Christmas tree guest soaps using that pigment that were a perfect green for the rainbow color scheme.

I chose my 3 least favorite Equality bars and shredded them down and separated the colors (and excluded the gross maroon color that was supposed to be green.  I'm sure that it will be lovely embedded in a different soap, though!).  I also shredded 2 of the small tree guests soaps for the green color I needed in the rainbow color pattern I wanted.

I really love the confetti look of this soap!  


I scented it with WSP's Pure Rain fragrance oil, because I was looking for a clean, ozone-y scent for this rainbow soap.  I mixed a white batter to a medium trace and poured 1/6 of the white batter with the shredded red color.  I did the same with the other 5 colors, ending up with the violet color on the top.

This made a HUGE bar - it will be over 6 oz when cured!!  Here's another photo:


I also ordered the heart tube mold at WSP, because I was inspired by the adorable soaps that Jennifer has been making with the mold.  I have been really loving the Pinkberry Mimosa fragrance oil from WSP also, and I made this batch with pink kaolin clay for the bottom part (and the top) and BB's Gold Mica for the top portion.  I am so happy with how this turned out! 

I'm sure I say this after most of my soaps, but this may be my new favorite :) I even am loving the halo effect that the cocoa powder is creating around the heart and throughout the pencil line.


{When I was looking at these pictures with my chin in my hand, I swore I could smell the fragrance.  Then I realized I WAS smelling the fragrance - since I just finished photographing these soaps, the smell was still there...  Maybe it's time to call it a night!}

Hope you all enjoy the weekend!  It feels like it's been raining every day since it stopped snowing in May, but tomorrow afternoon is supposed to be gorgeous, so I plan to be outside, celebrating with friends!

~Chrissy

Tuesday, May 28, 2013

Soap Volcano!!

I took some time this holiday weekend to catch up on some soap ideas I have had drawn out but haven't had time to make.  My first three batches turned out just as I had wanted them to - I'll write a post later when I have time to clean them up and get some good light for photos.  

The troublemaker was the next batch I attempted to make.  My fourth (and last) batch of the night was a remake of a hot process lavender soap with alkanet root.  I make it in my BB vertical mold, because I like that it keeps all of the edges nice and smooth, even though it is hot process.

{warning - this may or may not be a boring post - I didn't think to take any photos of this process, so it's going to be a "pictures with words" post :) }

I had run out of bowls and equipment to infuse my soaping oils with the alkanet root, so I had the brilliant idea to just infuse the alkanet root using my crockpot while I was working on my other soaps.  The infusion went great, although I needed a second pair of hands to help me strain out the alkanet root powder (thanks Kris!).  The oils were super hot, and I put them back in the crock pot to stay warm.  I mixed my essential oil blend and put it the table next to the oils so I didn't forget to put it in the oils.  Two seconds later, I knocked the cup over, and the whole soaping area still smells like lavender.  I suppose it could be worse - it could smell like neem oil!

The oils were HOT, though - around 180 degrees!  Since the soap batter over 200 degrees while it's cooking, I had the brilliant idea to just mix the 170 degree lye mixture with my 180 degree oils to save myself some time.  Luckily, I stayed by the crock pot to clean up after I had stick-blended the lye and oils, because less than 10 minutes later, this mixture of blue-purple beads started to volcano out of the crock pot and spill EVERYWHERE!  So, I yelled for my husband, stirred the soap back down into the crock pot, and took a couple deep breaths.  I also turned the crock pot down to low.

Luckily, the soap in the crock pot kept cooking and went through the normal phases.  It eventually didn't zap, and I got it in the mold without a problem.  I guess all's well that ends well, eh?

I've never seen a soap volcano, though, and I've definitely learned a thing or two from that harrowing experience!  If only I'd had the presence of mind to grab my camera so I could record it for posterity.  Hopefully I don't have another volcano to record...

~Chrissy

Saturday, May 18, 2013

Equality Soap!

I am not one to post political stuff on my blog, but I am proud that earlier this week, MN passed a law to legalize marriage equality!

George Takei even posted this pic on his FB page - she is a friend of my hubby.
So, to celebrate, and so that I could practice making layered soap, I decided to make a rainbow equality soap.  I had 2 2-lb loafs, so I figured even if I screwed one up, hopefully the other would still turn out.

I had bought some neons and oil-locking micas from WSP and also have some awesome neons from BB, and mixed my colors for the rainbow:  red, orange, yellow, green, blue, purple, and some white for hearts on the top.

I haven't used the WSP colors yet, and to my dismay, the oil-locking green turned a gross brown when I mixed it in the soap batter, and when it saponified, it turned this weird light maroon color.  Not quite what I was going for, but now I know not to use this for a green going forward :)

Here are some pics of the soap I took on this cloudy day today:

I'm happy with how the hearts turned out - I was really worried with keeping the top layer at a light enough trace to do this.

The layer between the yellow and blue is supposed to be green.  Disappointing.

I broke through the layers on one loaf, so I made it a spoon swirled rainbow :)

It looks kind of tie-dyed with the way the swirl came out.  I kind of like it!
Way to go MN!  Have a great Saturday, everyone!

~Chrissy

Monday, May 13, 2013

Rosemary Oleoresin Extract (ROE)

I like to use some oils that are soft and have a shorter shelf-life in my recipes, like sunflower oil.  In the past, I have used a mixture of Vitamin E (.5-1%) and Vitamin C (.25-.5%) to help retard rancidity in my soaps.  I haven't had many issues with rancidity to date, which has been great!  Due to how quickly I've been using my oils lately, I just add the extract directly to my master batch when the master batches are prepared.

However, when I was digging around on the internet for something else unrelated, I stumbled across this interesting study which seems to indicate that while Vitamin E & C have many great skin benefits and can help defer rancidity in oils in general, Rosemary Oleoresin is a better performer to preserve shelf life of oils in soap.  The article is written by Kevin Dunn (author of Scientific Soapmaking) and is a very interesting read:  http://cavemanchemistry.com/HsmgDos2006.pdf.

Since the ROE rancidity effect appears in this one study (I am trying to find other studies which will confirm these results), I wanted to give it a shot in some soaps to test drive it a bit.

I made a 2-loaf batch of a repeat of the soap I made for the mica swirled top challenge, and added the ROE to the oils at .5% of the oil weight.  However, while I was mixing the oils to trace, the ROE didn't mix in well with the rest of the soap batter.  There was a layer of reddish orange stuff floating on top of the batter, even as I stick-blended it through medium trace.  I didn't think to take a photo while this was going on.  Now that I've re-read the articles, I have definitely over-used the ROE in my soap batter (recommendation of .02-.1%, depending on where you're reading).  I also tried to soap cooler than normal - around 75 degrees, instead of my usual 110 degrees or so. Since these kind of challenges go in threes, I had also forgotten to put in the EO blend I had mixed up for this batch, so I'm going to make another batch tonight WITH the scent this time :)

What's interesting is that when the soap batter was poured, the top of the yellow layer looked pretty green.  However, when I went downstairs tonight to take pictures after it had set up for a couple days, the green layer on top has gone away. It must have re-absorbed into the soap?  Very strange.

Here you can see a very slight variation of color between the top and the side.  However, I had just unmolded the soap, so the color difference could be the more wet soap vs the drier top.

In this picture you can see the color a little, too, but the top doesn't look green like it did when it was soap batter.

Here's a picture of how they turned out cut.  I really like these colors for the scent, even though these ended up unscented :)

Another show-off picture

Here is a good blog post which looks at the anti-microbial claims of ROE and whether it can function as an effective general preservative:  http://swiftcraftymonkey.blogspot.com/2012/01/essential-oils-rosemary-essential-oil_17.html  (in short- it is not a sufficient stand-alone preservative system).  For anyone interested in cosmetic chemistry knowledge, Susan's blog is a great resource, and has some excellent starting recipes for lotions, shampoos, etc.

I've been researching what happens if one uses too much ROE in soaps, but I'm not finding a ton of information.  This soap will be relegated to personal use until I can determine whether it is safe to use.

Also, I had a friend over a few weekends ago to help me take some pictures and show me how to use my little old point-and-shoot.  She took some amazing pictures with the natural sunlight, and she showed me some good ways to set up and use my camera, too.  I'm so happy with how the pictures turned out!

Some Chocolate Mint cupcakes - they look like edible cupcakes!

The Challenge #3 soap - mica swirled tops

Yuzu / Orange soap

Soap Challenge #2 - Elemental Swirl

This one I took myself :)  Rosemary Mint.  It looks similar to the ones my friend took with her SLR camera, even though you can tell hers are better.


Have a great Monday!

~Chrissy

Wednesday, April 17, 2013

66 bars of soap on the table ... 66 bars of soap!

So, I worked pretty hard the other night, used up all the log molds I have, and made a bunch of honey oatmeal soap.  I have a palm- and coconut- free recipe for my sensitive skin friends, and I thought I would mass produce some honey soap.  I made 2 large batches - 33 bars each.

That's a whole lot of soap, you say.  Yes, I know, because I had to carry it all out to the garage to cool down, and then back inside once it was cool...


 Here are the first logs I cut into:
These are my 2-lb log molds.  I love them, but I haven't used them much lately.

I love how creamy this soap looks!
I had a 5-lb loaf, too, but I don't have pics of that one.  Interestingly, the freezer paper was all damp when I unmolded, and I had to peel a bunch of little paper bits off of the soap log.  I've never had that happen before.

Here they are after cutting.  The color will lighten in a few days.  I have them curing in their own room so that they do not pick up the scents of the other soaps, since this is an unscented, uncolored batch.
Unfortunately, these batches were not without their issues.  When I tried to unmold the SH mold, I really struggled getting the edge pieces away from the soap.  I should know by now that there's a reason they're difficult to get pulled off, but I just muscled through, and here's what happened when I twisted off one side...
Yep, soap was not ready to be unmolded.  The edge piece has a chunk of my soap attached now.
I will let these 3 logs just wait a little more.  I will unmold them when they're ready and not before :)

~Chrissy

Wednesday, March 20, 2013

Salt Bars (with safety update)

Up until recently, the only divided molds I have had are fancy-design cavity molds.  This is fine for regular soap, but I wanted to try my hand at salt bars.

Jenny at Lather Be Soaping posted this tutorial on salt bars, which explains a lot about why coconut oil (and the high percentage) and other things - definitely go and check out her post for more information and some pics of a beautiful bar of soap.  I wanted to try out making my own bars, and I got my hot little hands on some pink Himalayan salt to use.  My husband uses Himalayan salt blocks to cook steaks (which are delicious, by the way!), but I went and bought medium-ground salt for my soaps :)

I used the same recipe Jenny uses on her blog:
80% coconut oil
15% avocado oil (I love avocado oil!  I use it in all my recipes)
5% castor oil

I superfatted at 20%, since such a high % of coconut oil can be very drying.  My problem was understanding how to size this recipe.  I wasn't sure whether the salt would dissolve into the recipe or if it would add additional bulk to the recipe, so I sized it to fit a 9-bar mold for bars that were 3.5"x2.5"x1.25" (or approx 40 oz oils).  I added 36 oz of salt to the recipe at trace, since you can use a salt weight of anywhere from 50%-100% of the weight of the oils used.

I definitely over-produced :)  The salt does add additional volume to the bars (duh in retrospect), and it made nearly double what I was looking for.  Therefore, I needed to cut the bars in half to get them to a size that can be held (and used).

Here's a pic of the soap being mixed:
The salt didn't mix in as well as I thought it would...  I had to do the same thing as Jenny and switch to a whisk.  MUCH easier after that :)
Here it is in the slab mold before I put in the dividers.  One note on sliding in the dividers - I don't think I pushed hard enough on the dividers, and there was a layer of soap stuck underneath the dividers when I tried to unmold.  I haven't had this happen on my other soap recipes in this mold - may have been the thick batter and saltiness.
Love that pink color!
And here are the cut bars.  They got pretty crumbly around the edges when I tried to cut them.  I waited about two hours until they were solid-feeling (but still warm), and then cut with my miter box.  The soap was much crumblier than I had anticipated - probably because of how much undissolved salt was in the bar and I may have needed to cut them a little sooner...
The color is nice, but all the edges are kind of crumbly.  A couple days after cutting, though, and already the lather is feeling lotion-like.

I have a feeling that even though the salt bars may have won this round, I am going to win the battle!  (muah haha)

SAFETY UPDATE:  I realized after this posted that I am showing a picture of my bare hands with the caustic soap batter above.  When I soap, I follow the safety precautions prescribed by numerous blogs, including Soap Queen (Google cold process safety procedures if you're new to CP soaping and want to try it out).  I had removed my gloves to grab my camera to take this picture so that I wouldn't get soap batter on my camera from my gloves.  I just forgot to put the gloves back on for the picture.  Any soapers that are new who want to try this recipe, PLEASE PLEASE follow good safety practices for soap making.  


Listen to Sweet Brown - Lye Burns: Ain't nobody got time for that! :)


~Chrissy

Sunday, January 27, 2013

Soaps with Milk

Long absence everyone!  I have spent the past month enjoying time with family and friends, some down time for myself, and a little bit of time sick in bed with the flu that's going around and other various winter diseases.

But now, it's back to the blog (and hopefully soaping!) Last fall, I experimented with some milks in my soaps.  I had heard all about how lovely and creamy they made the lather, and I wanted to check it out for myself.  The first soap I made with cream (about 90% of the liquids) was this Pumpkin Spice soap, also using pumpkin puree and BB's Pumpkin Spice FO.  


It was awesome (and still is).  I loved the smell, it lathered beautifully, and it smelled delightfully pumpkin-y and also spicy for the fall.  This turned out so well, that I next tried this Gingersnap soap with coconut milk - 100% of the liquids for the lye. 

The colors turned out more gray than brown, even though the swirl was nice, and these bars in my slab mold were HUGE!  They averaged around 7oz when cut...  But when I was mixing the lye with the coconut milk, it started to turn a little orange.  That's okay, I told myself, because I'd read about it happening on various forums, blogs and soapmaking books.  I probably just was adding lye too fast to the milk.  However, when I got the solution mixed in and started to mix the soap batter, YUCK - what is that awful smell!  That coconut milk smells burnt and horrible!!

I told myself it would probably go away over time, and it is a favorite of many friends and family.  After curing for about 4-5 weeks, I no longer noticed the smell of the burnt milk, and my nose was not offended by this soap any more.  Great!

Next, I tried cream again (the heavy whipping cream from the grocery store) to make a peppermint soap.
I was sure I had the hang of soaping with milks now, so I was even faster about adding lye to the soap and used 100% cream for the liquid in the lye mixture.  I added the lye to cold cream (not frozen), and before long, it turned a brilliant orange.  I was not worried, because it had turned out well in the past, and I was sure this time would be no different.  As I was soaping, I tried not to notice the horrid smell of sour, burnt milk.  It was terrible.  I scented with peppermint EO to cover up the milk smell, and let it cure.

The scent did fade over time, I noticed.  But last week when I went to get my hubby a soap for his shower, I picked up a tester I had made from this batch. (I made a second batch also with less milk, which smells much more pleasant)  Holy Hannah, did that smell sour!  I made my hubby smell, and he promptly threw the bar in the garbage.

I am worried about using milks in my soaps after this horrible experience, not knowing whether I am just very sensitive to milk now since I haven't been eating dairy lately, or if it was something I messed up.  I did a little research, asked some questions on the Teach Soap Forum, and got some answers.  

It seems that I probably used too much milk in the recipe, and I am likely sensitive to the milky smell.  I will wait for awhile before I'm tempted to try milks in my soaps again.

On a more positive note, though, I did find a fantastic winter recipe I have been using for the horribly dry and bitterly cold winters we have up here in Minnesnowta, and I will get pics and a blog about that shortly!

Hope you all are staying warm!

Wednesday, December 5, 2012

Lye crystals vs soda ash

When I first started making soap, one thing I was really unsure about was how to tell the difference between soda ash (which is not harmful, but may affect appearance of the soap) and lye crystals (which are definitely harmful and would indicate the soap is lye-heavy and needs to be properly disposed of).  From what I had read, they were both white and formed kind of crystal-like on the tops of soaps as they cured.  Each time my soaps cured for the first few months, I would approach the soap with a fair amount of trepidation, lick my finger, touch the white crystals, and touch my tongue and wait to see if I got a *ZAP* like a 9-volt battery.

Perhaps these pictures will help others identify what white stuff on soap is safe and cosmetic only vs what is very dangerous.  I was trying to use up some oils that I'd had for a half year or so before they started to spoil, and I had gotten some Moroccan Red Clay in the mail, as well as some silk.  I wanted to make something moisturizing and gently exfoliating for the dry Minnesota winter coming up, and I had the evening by myself, so it was a perfect time to get down in my "lab" and play around.


So, I'm still not 100% sure what went wrong, but I am worried that I mis-measured the lye.  My husband helped me set up a soapy lab downstairs so I don't have to drag everything up to the kitchen each time I want to soap.  However, the light in the basement makes the scale a little tricky to read, so I have a feeling I just misread my digital scale and had way too much lye in this soap.

Here's the soap I made with the lye crystals.  It has also leaked lye-heavy liquid while it was curing, but that seemed to have seeped back into the mold by the time I took this picture.  See how it looks kind of spotty and crystalized?  Some of the whiter areas are where they lye liquid dried.


Here's a photo of some sample soaps I cut of a peppermint EO soap that had some pretty significant soda ash.  See how it looks less like crystals and more of a uniform "ashy" kind of white substance?


Here's a photo of both together (pardon the mess of my soap factory (and the quality of my pictures - taken on my iPhone with the previously-mentioned terrible lighting).

Here are the swirls from my caustic soap.  I'm so bummed I have to trash this batch!  The swirls turned out so pretty :(
At least I know the soap has great bubbles!  Check this out when I was cleaning out the mold!
So, time to toss this batch and try again.  I have wanted to play around with the BB Column Mold since my struggles unmolding my cream shave soap (I ended up hacking off the end with a small axe...).  Maybe this will be the soap for my second go with the column mold?

Happy Repeal Day!  Hope everyone is enjoying a cocktail tonight to celebrate the end of Prohibition :)  I am enjoying a Guinness and watching Bootleggers on TV!

~Chrissy

Wednesday, October 17, 2012

Hot Process, part deux

OK.  Yesterday was kind of a stressful day.  Maybe I've just been worrying about my wedding in about 10 days, or because I haven't slept well in a few days (due to poor Hobbes' non-stop intestinal distress), or I just was having a worrying day in general, but I thought making some soap would help calm me down and set me back on track.

So, I decided to make the following soaps:  re-try the hot process recipe from yesterday's post, make a vertical-mold white and blue soap with BB's Fresh Snow fragrance, and try out some natural colorants with BB's Applejack Peel FO.

Let's start with the first soap I made - the hot process soap, part two:


 I made the soap using the same recipe as the first batch, but I resized it to fit my 2 lb loaf mold, rather than put it in the cavity molds like I did last time.  I also used less ultramarine blue to try to get the soap to be more purple-y.  I loved the color in the crock pot!  I also used some sodium lactate to try to get it to harden better.
Hooray!!  It set up overnight!!  I was able to unmold it this morning, and snap this pic with the very early light in the dining room today.  The color lightened up significantly, but I still like it.  And I really like the lavender / bergamot EO scents I used.  The top is kind of rough-looking, but the sides really surprised me with how flat and clean they turned out to be.  I may try to do this more often!

Now for the trouble soaps.  Soap #2 - I wanted to make a Celine swirled soap (see blog of the inventor of this swirl here).  I have some madder root and burdock root that I've been wanting to play with, so I did an infusion of each in olive oil.  2 tbsp of madder root in 1 cup of olive oil and warmed in the microwave, and 4 tbsp of burdock in 1 cup of olive oil and warmed in the microwave.  The burdock root made a light green, so I may have to play around with that some more to see if I can get it to be a more distinctive green, but the madder root was a beautiful color.

I was talking with my fiance and soaping and not really paying a ton of attention to what I was doing, apparently, because after I had swirled and finished the soap, OH CRAP, I forgot to put in the FO.  Ugh.  So, it's now a red, green and white swirled soap that is naturally colored and unscented.  
 Here it is swirled and in the mold.  I think it will look beautiful, and I got to play with colorants, so it's not a wasted soap!
Here's what the colors looked like - I remembered to take a photo only after I had started to pour the soap into the mold.  Madder root on the top right, burdock in the lower middle, and plain uncolored soap on the top left.  Will post pics of the cut soap later.

Soap #3.  I had in mind to make a beautiful swirled soap with BB's Fresh Snow fragrance oil using the vertical mold and slowly twisting the divider as I pulled it out of the mold.  I mixed the oils and put some super pearly white mica in the oils before I added the lye, to see how it would look.  Here is the beautiful pearly oil mix in the pot:
I then added the lye, divided into two parts, and added a tiny bit of ultramarine blue in one part to color it a delicate, shimmery blue.  I stick blended, and got the help of my fiance and  poured into the divided vertical mold. I twisted the divider and felt awesome about how the top looked.

Are you noticing something *missing*?  YES.  THE FRAGRANCE.  AGAIN.  So, instead of having 2 unscented soaps tonight, I scented the leftover soaps that didn't fit in the vertical mold, poured the contents of the mold into the pot and did an in-the-pot swirl.  Poured it back in the vertical mold again and the leftovers into cavity molds.  I am really disappointed.  What was supposed to be sparkly and delicately swirled, like fresh fallen snow, looks muddy.  I like the smell, though, and it was another new recipe, so it will likely be a "tester" batch for my squeaky-clean team of feedback providers.

What a night!  I am glad I have to wait a few days to unmold this one, because I don't think I can look at it right now. Maybe in a few days I will be better able to evaluate this one.  I know we should always have plan B's when soaping, and not to get too attached to a design, and this was a tough lesson for me.

Better luck next time!

~Chrissy

Tuesday, October 16, 2012

What did I do wrong? Hot Process Edition

I wanted to try a crock pot Hot Process soap, since I received this lovely beauty from my friend Andrea:


 It's a well-loved crock pot, and it came at a great price - free! 

Hobbes always needs to be involved in my photos.  He's a very curious dog...

Last Wednesday, I did some research online, read the chapter on Hot Process a number of times in my The Everything Soapmaking Book, and decided to have a go.  I tried the recipe on page 149 fr dry skin, since I had all of the ingredients for the soap itself.  I colored it with ultramarine blue and ultramarine purple and scented it with Lavendar and Bergamot EO.

I probably should have tried this when I was less pressed for time - I had to run to a volleyball game and had just enough time for the soap to cook and to get it in a mold.  Since I was running late, I didn't think to take photos of the soap while cooking, but I did stir it a few times as it cooked.

Here's what it looked like when I glopped it in the molds:


Love how it smells, but the color is a little too blue.  I also think it looks a little grainy.  It tested as neutral, I got it pressed down and went to my game (which we ended up losing.  Tough night!).

Today, nearly a week later, the soap is still really soft and I can sculpt it and mold it around.  It won't come out of the molds, so I took a knife to try to loosen the edges.  I can scoop the soap out in scoops:


It still smells great, and I still think it's too blue, but I have no idea what happened...  Did I not wait long enough to unmold?  Does it need to set for longer than a week?  I measured everything in ounces as per the recipe, so I'm sure it wasn't as precise as if the recipe was in grams.

I've never made hot process before, so any thoughts would be appreciated! 

~Chrissy